外观
1,在Docker安装fastdfs
使用tar包
(1)首先将tar包拖进到我们linux目录/opt下面
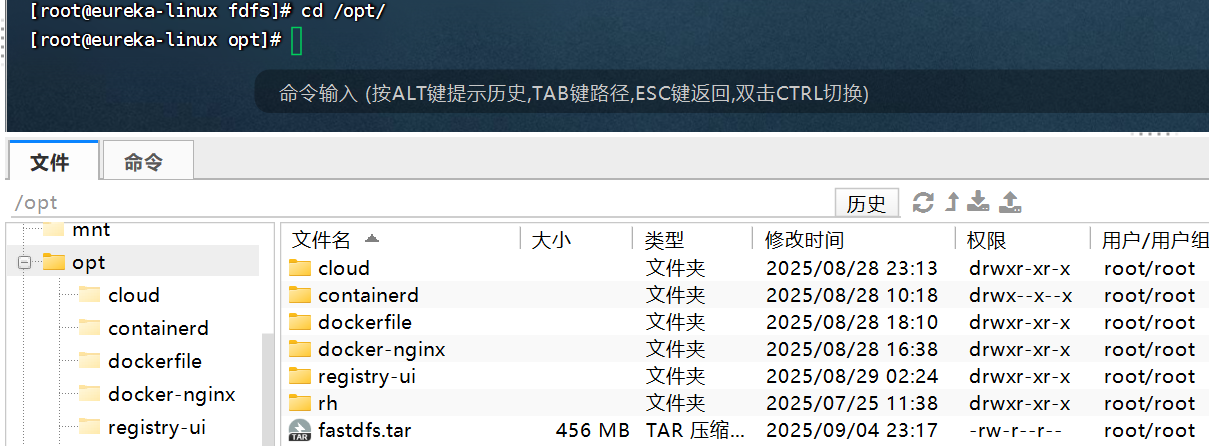
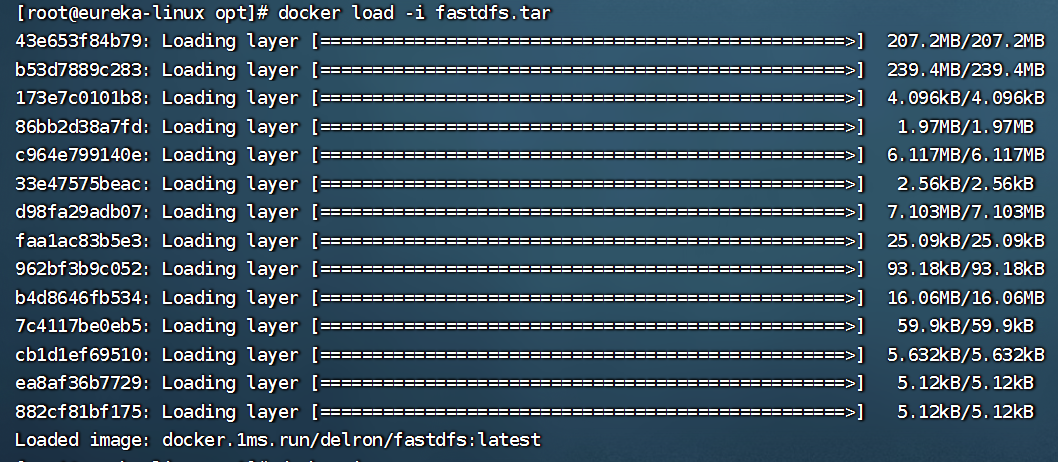
(2)运行命令,将tar包转换为Docker镜像
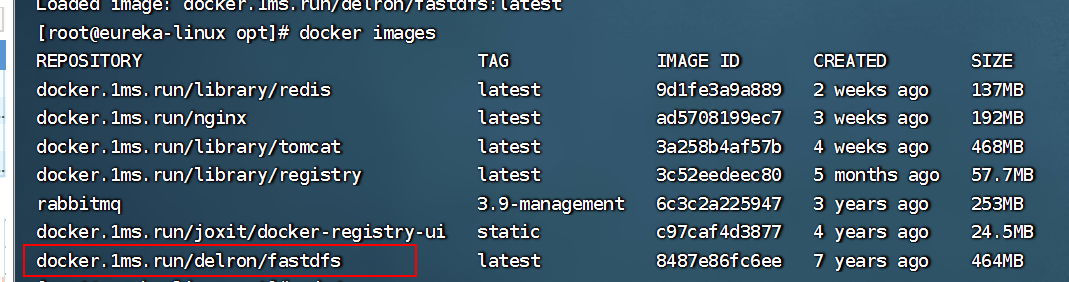
(3)查看镜像命令docker images
(4) 使⽤ docker 镜像构建 tracker 容器(跟踪服务器,起到调度的作⽤)
docker run -dti --network=host --name tracker -v /var/fdfs/tracker:/var/fdfs -v /etc/localtime:/etc/localtime docker.1ms.run/delron/fastdfs tracker
(5) 使⽤ docker 镜像构建 storage 容器(存储服务器,提供容量和备份服务)
docker run -dti --network=host --name storage -e TRACKER_SERVER=192.168.25.3:22122 -v /var/fdfs/storage:/var/fdfs/ -v /etc/localtime:/etc/localtime docker.1ms.run/delron/fastdfs storage
(6) 测试 进⼊ storage 容器,进⼊ /var/fdfs ⽬录
docker exec -it storage bash
cd /var/fdfs
echo hello 这是一个测试用例>a.txt
/usr/bin/fdfs_upload_file /etc/fdfs/client.conf a.txt

(7)访问http://192.168.25.3:8888/group1/M00/00/00/wKgZA2i5tyiAcOJeAAAAH93k9Eg208.txt(如下代表访问成功)

其中 8888 是 nginx 代理 fastdfs 的访问端⼝。 默认 8888
或者从远程Docker镜像仓库拉去
(1)docker pull docker.1ms.run/delron/fastdfs
(2)按照上述使用tar包的命令安装就行
2,使用fastdfs上传文件
(1)创建SpringBoot项目
(2)导入依赖
plain
<dependency>
 <groupId>org.springframework.boot</groupId>
 <artifactId>spring-boot-starter-web</artifactId>
</dependency>
<!-- 数据连接驱动 -->
<dependency>
 <groupId>mysql</groupId>
 <artifactId>mysql-connector-java</artifactId>
 <version>8.0.16</version>
</dependency>
<dependency>
 <groupId>org.projectlombok</groupId>
 <artifactId>lombok</artifactId>
 <optional>true</optional>
</dependency>
<dependency>
 <groupId>org.springframework.boot</groupId>
 <artifactId>spring-boot-starter-test</artifactId>
 <scope>test</scope>
</dependency>
<!-- mybatis-plus -->
<dependency>
 <groupId>com.baomidou</groupId>
 <artifactId>mybatis-plus-boot-starter</artifactId>
 <version>3.5.3.1</version>
</dependency>
<!-- 代码生成工具 -->
<dependency>
 <groupId>com.baomidou</groupId>
 <artifactId>mybatis-plus-generator</artifactId>
 <version>3.5.2</version>
</dependency>
<!-- 代码生成模板 -->
<dependency>
 <groupId>org.apache.velocity</groupId>
 <artifactId>velocity-engine-core</artifactId>
 <version>2.3</version>
</dependency>
<!-- fastDFS分布式文件存储 -->
<dependency>
 <groupId>com.github.tobato</groupId>
 <artifactId>fastdfs-client</artifactId>
 <version>1.27.2</version>
</dependency>
(3)创建启动类
plain
package com.xja.application;

import com.github.tobato.fastdfs.FdfsClientConfig;
import org.springframework.boot.SpringApplication;
import org.springframework.boot.autoconfigure.SpringBootApplication;
import org.springframework.context.annotation.EnableMBeanExport;
import org.springframework.context.annotation.Import;
import org.springframework.jmx.support.RegistrationPolicy;

//fastdfs
`@Import`(FdfsClientConfig.class)
`@EnableMBeanExport`(registration = RegistrationPolicy.IGNORE_EXISTING)
`@SpringBootApplication`
public class ToolsApplication {
 public static void main(String[] args) {
 SpringApplication.run(ToolsApplication.class, args);
 }
}
(4)在数据库创建表

(5)利用代码生成器生成web三层架构以及实体类
plain
package com.xja.application.generation;

import com.baomidou.mybatisplus.annotation.IdType;
import com.baomidou.mybatisplus.generator.AutoGenerator;
import com.baomidou.mybatisplus.generator.config.*;
import com.baomidou.mybatisplus.generator.config.querys.MySqlQuery;
import com.baomidou.mybatisplus.generator.config.rules.DateType;
import com.baomidou.mybatisplus.generator.config.rules.NamingStrategy;

import java.util.Arrays;
import java.util.Collections;
import java.util.List;
import java.util.Scanner;

public class CodeGeneration {
 public static void main(String[] args) {
 /**
 * 先配置数据源
 */
 MySqlQuery mySqlQuery = new MySqlQuery() {
 `@Override`
 public String[] fieldCustom() {
 return new String[]{"Default"};
 }
 };


 DataSourceConfig dsc = new DataSourceConfig.Builder("jdbc:mysql://192.168.25.3:3306/tools?&useUnicode=true&characterEncoding=utf-8&serverTimezone=Asia/Shanghai&useSSL=false","root","MySQL5.7#")
 .dbQuery(mySqlQuery).build();
 //通过datasourceConfig创建AutoGenerator
 AutoGenerator generator = new AutoGenerator(dsc);


 Scanner scanner = new Scanner(System.in);
 System.out.println("代码生成的绝对路径(右键项目->copy path):");
 String projectPath = scanner.next();
 System.out.println("请输入表名,多个英文逗号分隔,所有输入 all");
 String s = scanner.next();

 /**
 * 全局配置
 */
 //String projectPath = System.getProperty("user.dir"); //获取项目路径

 String filePath = projectPath + "/src/main/java"; //java下的文件路径
 GlobalConfig global = new GlobalConfig.Builder()
 .outputDir(filePath)//生成的输出路径
 .author("lizi")//生成的作者名字
 //.enableSwagger() //开启swagger,需要添加swagger依赖并配置
 .dateType(DateType.TIME_PACK)//时间策略
 .commentDate("yyyy年MM月dd日")//格式化时间格式
 .disableOpenDir()//禁止打开输出目录,默认false
 .fileOverride()//覆盖生成文件
 .build();

 /**
 * 包配置
 */
 PackageConfig packages = new PackageConfig.Builder()
 .entity("pojo")//实体类包名
 .parent("com.xja.application")//父包名。如果为空,将下面子包名必须写全部, 否则就只需写子包名
 .controller("web")//控制层包名
 .mapper("mapper")//mapper层包名
 .xml("mapper.xml")//数据访问层xml包名
 .service("service")//service层包名
 .serviceImpl("service.impl")//service实现类包名
 //.other("output")//输出自定义文件时的包名
 .pathInfo(Collections.singletonMap(OutputFile.xml, projectPath + "/src/main/resources/mapper")) //路径配置信息,就是配置各个文件模板的路径信息,这里以mapper.xml为例
 .build();
 /**
 * 模板配置
 */

 // 如果模板引擎是 freemarker
// String templatePath = "/templates/mapper.xml.ftl";
// 如果模板引擎是 velocity
 // String templatePath = "/templates/mapper.xml.vm";


 TemplateConfig template = new TemplateConfig.Builder()
// .disable()//禁用所有模板
 //.disable(TemplateType.ENTITY)禁用指定模板
// .service(filePath + "/service.java")//service模板路径
// .serviceImpl(filePath + "/service/impl/serviceImpl.java")//实现类模板路径
// .mapper(filePath + "/mapper.java")//mapper模板路径
// .mapperXml("/templates/mapper.xml")//xml文件模板路路径
// .controller(filePath + "/controller")//controller层模板路径
 .build();

 /**
 * 注入配置,自定义配置一个Map对象
 */
// Map<String,Object> map = new HashMap<>();
// map.put("name","young");
// map.put("age","22");
// map.put("sex","男");
// map.put("description","深情不及黎治跃");
//
// InjectionConfig injectionConfig = new InjectionConfig.Builder()
// .customMap(map)
// .build();


 /**
 * 策略配置开始
 */
 StrategyConfig strategyConfig = new StrategyConfig.Builder()
 .enableCapitalMode()//开启全局大写命名
 //.likeTable()模糊表匹配
 .addInclude(getTables(s))//添加表匹配,指定要生成的数据表名,不写默认选定数据库所有表
 .addTablePrefix("tb_", "sys_","bus_","rel_","dic_") //设置忽略表前缀
 //.disableSqlFilter()禁用sql过滤:默认(不使用该方法)true
 //.enableSchema()启用schema:默认false

 .entityBuilder() //实体策略配置
 //.disableSerialVersionUID()禁用生成SerialVersionUID:默认true
 .enableChainModel()//开启链式模型
 .enableLombok()//开启lombok
 .enableRemoveIsPrefix()//开启 Boolean 类型字段移除 is 前缀
 .enableTableFieldAnnotation()//开启生成实体时生成字段注解
 //.addTableFills()添加表字段填充
 .naming(NamingStrategy.underline_to_camel)//数据表映射实体命名策略:默认下划线转驼峰underline_to_camel
 .columnNaming(NamingStrategy.underline_to_camel)//表字段映射实体属性命名规则:默认null,不指定按照naming执行
 .idType(IdType.AUTO)//添加全局主键类型
 .formatFileName("%s")//格式化实体名称,%s取消首字母I
 .build()

 .mapperBuilder()//mapper文件策略
 .enableMapperAnnotation()//开启mapper注解
 .enableBaseResultMap()//启用xml文件中的BaseResultMap 生成
 .enableBaseColumnList()//启用xml文件中的BaseColumnList
 //.cache(缓存类.class)设置缓存实现类
 .formatMapperFileName("%sMapper")//格式化Dao类名称
 .formatXmlFileName("%sMapper")//格式化xml文件名称
 .build()

 .serviceBuilder()//service文件策略
 .formatServiceFileName("%sService")//格式化 service 接口文件名称
 .formatServiceImplFileName("%sServiceImpl")//格式化 service 接口文件名称
 .build()

 .controllerBuilder()//控制层策略
 //.enableHyphenStyle()开启驼峰转连字符,默认:false
 .enableRestStyle()//开启生成`@RestController`
 .formatFileName("%sController")//格式化文件名称
 .build();
 /*至此,策略配置才算基本完成!*/

 /**
 * 将所有配置项整合到AutoGenerator中进行执行
 */


 generator.global(global)
 .template(template)
// .injection(injectionConfig)
 .packageInfo(packages)
 .strategy(strategyConfig)
 .execute();
 }

 // 处理 all 情况
 protected static List<String> getTables(String tables) {
 return "all".equals(tables) ? Collections.emptyList() : Arrays.asList(tables.split(","));
 }
}
(6)application.yml配置类中
plain
server:
 port: 8080

spring:
 datasource:
 url: jdbc:mysql://192.168.25.3:3306/tools?serverTimezone=Asia/Shanghai&useSSL=false&allowPublicKeyRetrieval=true
 driver-class-name: com.mysql.cj.jdbc.Driver
 username: root
 password: MySQL5.7#

 mybatis-plus:
 configuration:
 log-impl: org.apache.ibatis.logging.stdout.StdOutImpl
 #控制当前上传文件的最大值
 servlet:
 multipart:
 max-file-size: 600MB

fdfs:
 so-timeout: 1501
 connect-timeout: 601
 thumb-image: # 缩略图
 width: 100
 height: 100
 tracker-list: # tracker地址(单节点接配置一个,多节点可以自己走负载均衡)
 - 192.168.25.3:22122
 view-base-url: http://192.168.25.3:8888 #网页应用配置服务器地址
(7)在FileUploadController中编辑
plain
package com.xja.application.web;

import com.xja.application.pojo.FileUpload;
import com.xja.application.service.FileUploadService;
import com.xja.application.utils.R;
import org.springframework.beans.factory.annotation.Autowired;
import org.springframework.web.bind.annotation.*;
import org.springframework.web.multipart.MultipartFile;

/**
 * <p>
 * 前端控制器
 * </p>
 *
 * `@author` lizi
 * `@since` 2025年09月10日
 */
`@RestController`
`@RequestMapping`("/fileUpload")
public class FileUploadController {
 `@Autowired`
 private FileUploadService fileUploadService;

 `@PostMapping`("singleFile")//文件上传
 public R singleFile(`@RequestBody` MultipartFile file) {
 R r = fileUploadService.singleFile(file);
 String data = (String) r.getData();
 System.out.println("data = " + data);
 return R.Success(data);
 }

 `@PostMapping`("submit")//提交到数据库
 public R submit(`@RequestBody` FileUpload fileUpload) {
 System.out.println("fileUpload = " + fileUpload + "----------------------");
 return R.Success("数据保存下成功",fileUploadService.save(fileUpload));
 }

}
(8)编辑FileUploadService接口
plain
package com.xja.application.service;

import com.xja.application.pojo.FileUpload;
import com.baomidou.mybatisplus.extension.service.IService;
import com.xja.application.utils.R;
import org.springframework.web.multipart.MultipartFile;

/**
 * <p>
 * 服务类
 * </p>
 *
 * `@author` lizi
 * `@since` 2025年09月10日
 */
public interface FileUploadService extends IService<FileUpload> {

 R singleFile(MultipartFile file);
}
(9)编辑FileUploadService接口的实现类FileUploadServiceImpl
plain
package com.xja.application.service.impl;

import com.github.tobato.fastdfs.domain.fdfs.StorageNode;
import com.github.tobato.fastdfs.domain.fdfs.StorePath;
import com.github.tobato.fastdfs.domain.fdfs.ThumbImageConfig;
import com.github.tobato.fastdfs.service.FastFileStorageClient;
import com.xja.application.pojo.FileUpload;
import com.xja.application.mapper.FileUploadMapper;
import com.xja.application.service.FileUploadService;
import com.baomidou.mybatisplus.extension.service.impl.ServiceImpl;
import com.xja.application.utils.R;
import org.springframework.beans.factory.annotation.Autowired;
import org.springframework.stereotype.Service;
import org.springframework.web.multipart.MultipartFile;

import java.io.IOException;
import java.io.InputStream;

/**
 * <p>
 * 服务实现类
 * </p>
 *
 * `@author` lizi
 * `@since` 2025年09月10日
 */
`@Service`
public class FileUploadServiceImpl extends ServiceImpl<FileUploadMapper, FileUpload> implements FileUploadService {
 `@Autowired`
 private FileUploadMapper fileUploadMapper;
 `@Autowired`//FastDfs客户端
 private FastFileStorageClient fastFileStorageClient;
 `@Autowired`//读取缩略图
 private ThumbImageConfig thumbImageConfig;

 `@Override`
 public R singleFile(MultipartFile file) {
 //先上传,然后将路径返回给前端
 try {
 //读取文件大小
 long size = file.getSize();
 //后缀
 String originalFilename = file.getOriginalFilename();
 int lastIndex = originalFilename.lastIndexOf(".");
 String extName = originalFilename.substring(lastIndex + 1);
 //输入流
 InputStream inputStream = file.getInputStream();
 StorePath storePath = fastFileStorageClient.uploadFile(inputStream, size, extName, null);
 //返回已经上传到FastDfs上的路径
 return R.Success("文件上传成功", storePath.getFullPath());
 } catch (IOException e) {
 e.printStackTrace();
 return R.Success("文件上传失败");
 }
 }
}
(10)编辑前端页面,在前端项目view中的src下面的views目录下创建一个upload文件夹编写一个FileUpload的文件()

plain
<script setup>
import {reactive, ref} from "vue";
import {ElMessage, ElMessageBox} from "element-plus";
import axios from "axios";
import http from "@/utils/http";
//单文件开始
const data = reactive({
fileList:[],
fileUpload:{}
})
const handlePreviewSingleFile = (uploadFile) => {
console.log(uploadFile)
}
const handleRemoveSingleFile = (file, uploadFiles) => {
console.log(file, uploadFiles)//文件列表移除文件的钩子
}
const handleExceedSingleFile = (files, uploadFiles) => {
ElMessage.warning(
`The limit is 1, you selected ${files.length} files this time, add up to ${
files.length + uploadFiles.length
} totally`
)
//当文件超出限制时,执行的钩子函数
}
const successSingleFile = (response, uploadFile, uploadFiles) => {
//成功之后执行的方法
if(response.code === 100200){//成功
console.log(response)
data.fileUpload.file = response.data
ElMessage({
message: response.msg,
type: 'success',
})
}else {
ElMessage({
message: response.msg,
type: 'success',
})
}
}
//校验
const beforeUploadSingleFile = (rawFile) => {
if(rawFile.type !== "application/pdf"){
ElMessage({
message: '只允许上传pdf类型的文件',
})
return false;
}
if(rawFile.size / 1024 / 1024 > 600){
ElMessage({
message: '文件超出600MB',
})
return false;
}
return true;
}
const submit = () => {
data.fileUpload.info = '测试'
data.fileUpload.datetime = '2025-09-10 19:00:00'
console.log(data.fileUpload)
http.post("http://localhost:8080/fileUpload/submit", data.fileUpload).then(response => {
console.log(response)
})
}
//单文件结束
</script>
<template>
<div>
<div>单文件上传</div>
<el-upload
ref="uploadRef"
v-model:file-list="data.fileList"
class="upload-demo"
action="http://localhost:8080/fileUpload/singleFile"
:on-preview="handlePreviewSingleFile"
:on-remove="handleRemoveSingleFile"
:limit="1"
:before-upload="beforeUploadSingleFile"
:on-success="successSingleFile"
:on-exceed="handleExceedSingleFile"
>
<!-- <el-button type="primary">点击上传</el-button>-->
<template #trigger>
<el-button type="primary">点击上传</el-button>
</template>
<el-button class="ml-3" type="success" `@click`="submit">
提交
</el-button>
<template #tip>
<div class="el-upload__tip">
上传pdf类型,且不超过600MB
</div>
</template>
</el-upload>
</div>
<hr>
<div style="color: red;font-weight: bold">
1,依赖 <br>
2,配置yml文件<br>
3,启动类配置fastdfs<br>
</div>
</template>
<style scoped>
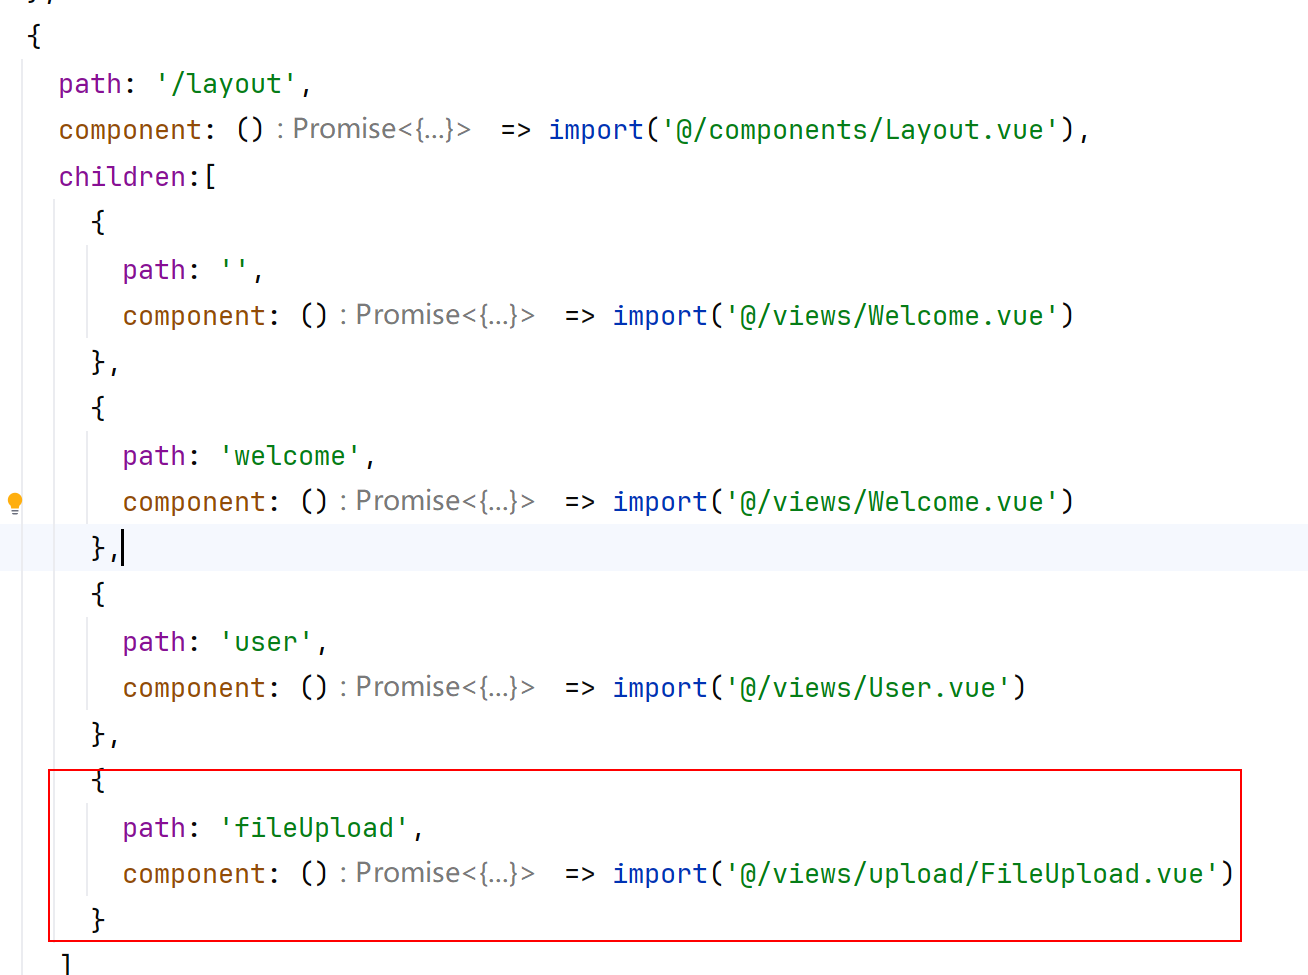
</style>(11)在路由里面声明
plain
import { createRouter, createWebHistory } from 'vue-router'
const routes = [
{
path: '/',
component: () => import('@/views/Login.vue')
},
{
path: '/login',
component: () => import('@/views/Login.vue')
},
{
path: '/layout',
component: () => import('@/components/Layout.vue'),
children:[
{
path: '',
component: () => import('@/views/Welcome.vue')
},
{
path: 'welcome',
component: () => import('@/views/Welcome.vue')
},
{
path: 'user',
component: () => import('@/views/User.vue')
},
{
path: 'fileUpload',
component: () => import('@/views/upload/FileUpload.vue')
}
]
}
]
const router = createRouter({
history: createWebHistory(process.env.BASE_URL),
routes
})
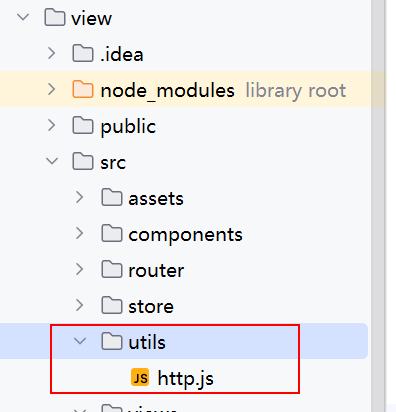
export default router(12)在view目录下创建一个名为utils的文件夹并编写一个名为http.js的文件(此文件主要封装了全局路径以及过滤器)还需下载axios (运行命令为yarn add axios)
plain
import axios from "axios";

const http = axios.create({
 baseURL: "http://localhost:8080/",
 timeout: 3000,
})

// Add a request interceptor
http.interceptors.request.use(function (config) {
 // Do something before request is sent

 // 验证用户是否登录
 /*let admin = sessionStorage.getItem("admin");
 if(admin == null || admin == ''){
 //需要重新登录
 router.push('/login')
 ElMessage.error('账号登录状态已经过期,请重新登录')
 }*/

 console.log("请求拦截")
 return config;
}, function (error) {
 // Do something with request error
 return Promise.reject(error);
});

// Add a response interceptor
http.interceptors.response.use(function (response) {
 // Do something with response data
 //处理响应数据多一层的问题
 return response.data;
}, function (error) {
 // Do something with response error
 return Promise.reject(error);
});
export default http
注:因可以在为封装可全局路径,所以可以在FileUpload.vue文件中使用http进行全局路径的设置
如下:
- ,提交文件到FastDfs中返回路径时

- ,将信息保存到数据库时

删除上传到FastDfs中的浏览器访问路径
说明:当上传好文件时点击右下角x时删除以及在FastDfs中存在的路径(如下图)

(1)编写FileUploadController中的接口
plain
`@DeleteMapping`("singleDeleteFileUrl")//删除文件路径
public R singleDeleteFileUrl(String url) {
return R.Success(fileUploadService.singleDeleteFileUrl(url));
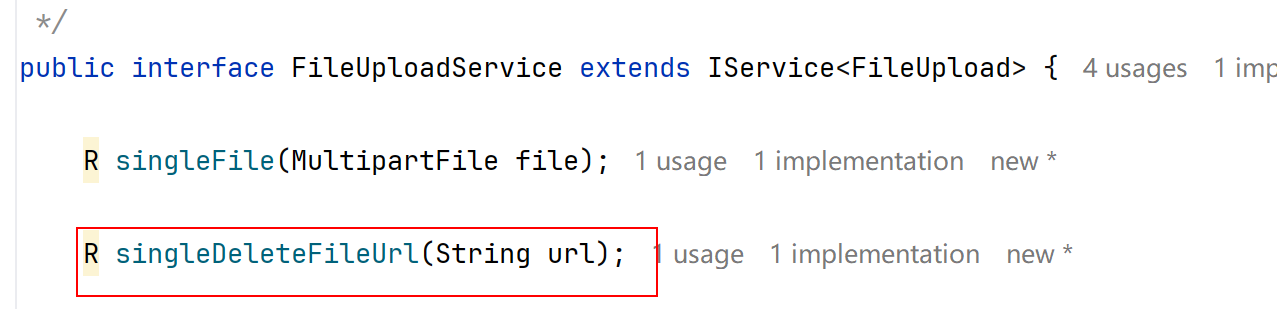
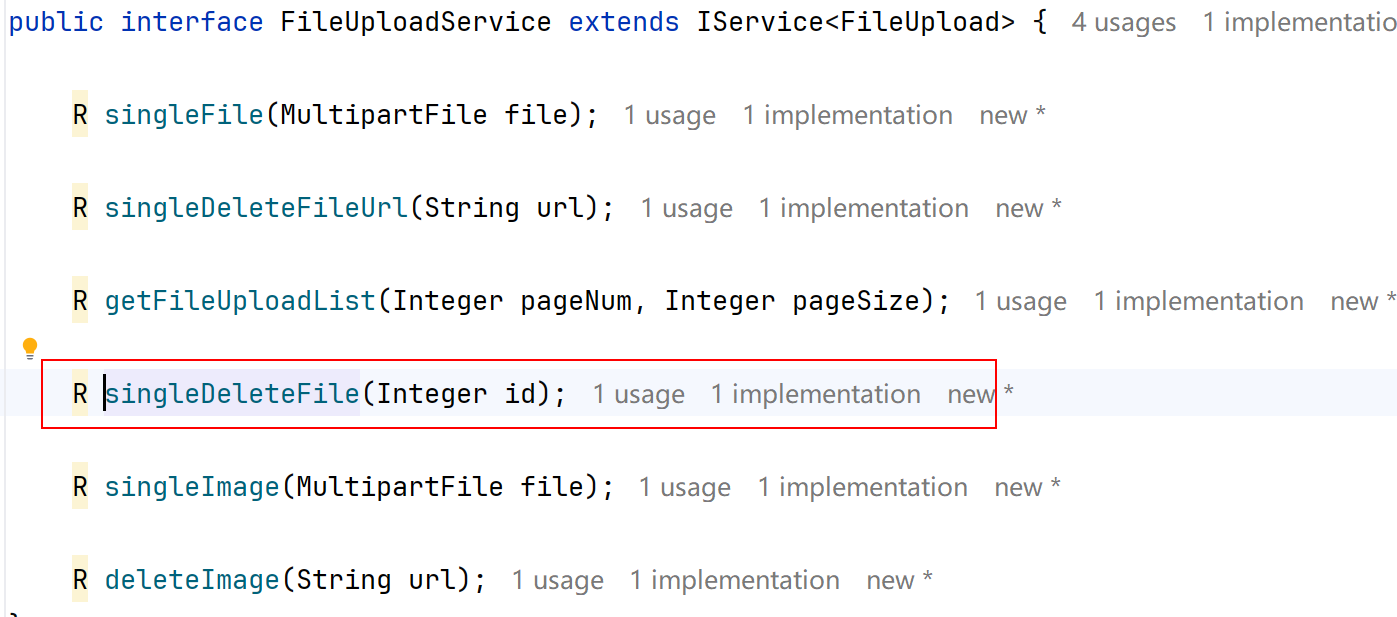
}(2)对应的FileUploadService接口中
(3)接口对应的实现类FileUploadServiceImpl代码
plain
`@Override`
public R getFileUploadList(Integer pageNum, Integer pageSize) {
 PageHelper.startPage(pageNum,pageSize);
 List<FileUpload> fileUploadsList = fileUploadMapper.selectList(null);
 return R.Success("返回数据成功", new PageInfo<FileUpload>(fileUploadsList));
}
(4)vue中的代码
plain
//文件列表移除文件的钩子
const handleRemoveSingleFile = (file, uploadFiles) => {
 http.delete("/fileUpload/singleDeleteFileUrl",{
 params:{
 url:file.response.data
 }
 }).then(response => {
 if(response.code === 100200){//成功
 ElMessage({
 message: response.msg,
 type: 'success',
 })
 }else {
 ElMessage({
 message: response.msg,
 type: 'success',
 })
 }
 })
}
(5)启动项目进行测试
提交上传后的信息保存至数据库(包含上传到FastDfs后返回的路径)
(1)SingleFile.vue新增内容(提交按钮以及绑定事件)
plain
<el-button class="ml-3" type="success" `@click`="submit">
 提交
</el-button>
plain
const submit = () => {
 data.fileUpload.info = '测试'
 data.fileUpload.datetime = '2025-09-10 19:00:00'
 console.log(data.fileUpload)
 http.post("fileUpload/submit", data.fileUpload).then(response => {
 if(response.code === 100200){//成功
 ElMessage({
 message: response.msg,
 type: 'success',
 })
 getFileUploadList();
 }else {
 ElMessage({
 message: response.msg,
 type: 'success',
 })
 }
 })
}
(2)FileUploadController中编写接口
plain
`@PostMapping`("submit")//提交数据库
public R submit(`@RequestBody` FileUpload fileUpload) {
 return R.Success("数据保存下成功",fileUploadService.save(fileUpload));
}
(3)测试
分页展示数据口的信息
(1)首先在pom文件中导入依赖分页工具
plain
<!--pagehelper分页插件-->
<dependency>
 <groupId>com.github.pagehelper</groupId>
 <artifactId>pagehelper-spring-boot-starter</artifactId>
 <version>2.0.0</version>
</dependency>
(2)编写SingleFile.vue中新增
调用后端方法获取数据库信息
plain
//获取表单数据
const getFileUploadList = () => {
 http.get("fileUpload/getFileUploadList",{
 params:{
 pageNum:data.pageNum,
 pageSize:data.pageSize
 }
 }).then(response => {
 console.log(response)
 data.FileUploadList = response.data.data.list;
 data.total = response.data.data.total;
 data.pageNum = response.data.data.pageNum;
 data.pageSize = response.data.data.pageSize;
 })
}
Table表格展示数据
plain
<br>
<el-table :data="data.FileUploadList" border style="width: 100%">
<el-table-column type="index" label="序号" width="180" align="center" />
<el-table-column prop="info" label="描述" width="200" align="center"/>
<el-table-column prop="file" label="路径" align="center"/>
<el-table-column prop="datetime" label="时间" width="180" align="center"/>
<el-table-column label="操作" width="180" align="center">
<template #default="scope">
<el-popconfirm `@confirm`="handleDelete(scope.row.id)" title="确认删除吗?">
<template #reference>
<el-button size="small" type="danger" >删除</el-button>
</template>
</el-popconfirm>
</template>
</el-table-column>
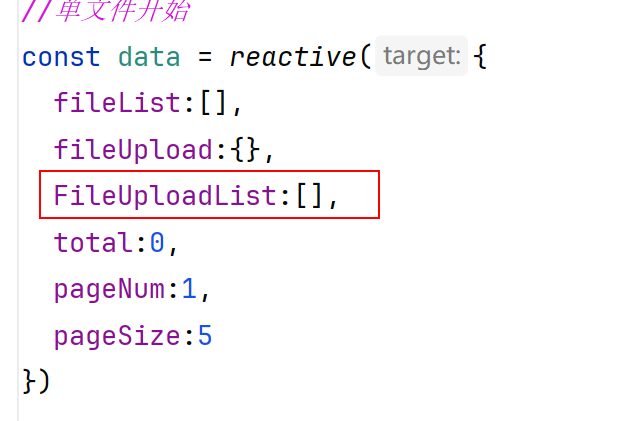
</el-table>data中加入FileUploadList数组,储存数据库返回的信息
编写FileUploadController中的接口
plain
`@GetMapping`("getFileUploadList")//分页展示
public R getFileUploadList(
`@RequestParam`(value = "pageNum",defaultValue = "1") Integer pageNum,
`@RequestParam`(value = "pageSize",defaultValue = "5") Integer pageSize
) {
return R.Success("获取数据成功",fileUploadService.getFileUploadList(pageNum,pageSize));
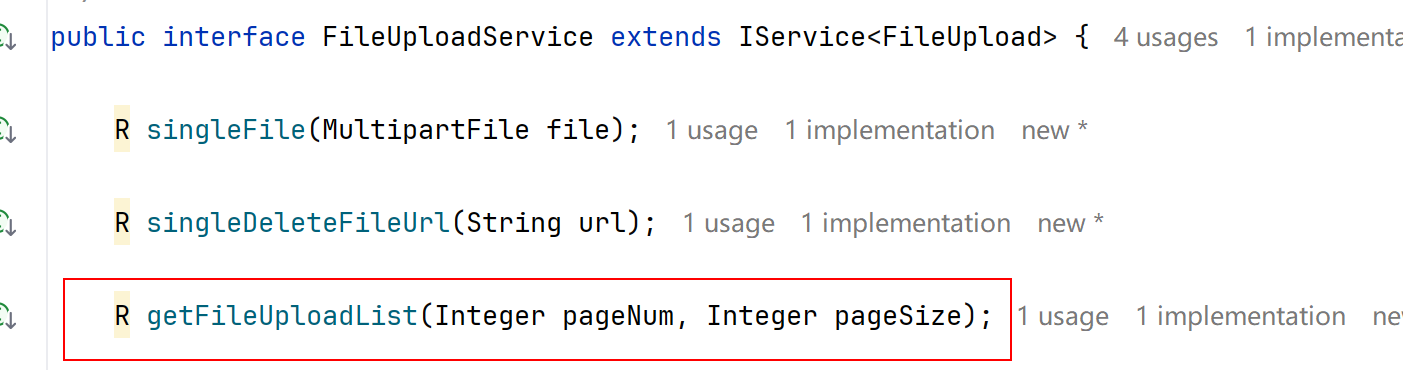
}对应的接口FileUploadService以及实现类FileUploadServiceImpl
plain
`@Override`
public R getFileUploadList(Integer pageNum, Integer pageSize) {
 PageHelper.startPage(pageNum,pageSize);
 List<FileUpload> fileUploadsList = fileUploadMapper.selectList(null);
 return R.Success("返回数据成功", new PageInfo<FileUpload>(fileUploadsList));
}
删除数据库信息以及删除FastDfs中的路径
(1)前端页面添加点击按钮以及对应的点击事件
plain
<template #default="scope">
 <el-popconfirm `@confirm`="handleDelete(scope.row.id)" title="确认删除吗?">
 <template #reference>
 <el-button size="small" type="danger" >删除</el-button>
 </template>
 </el-popconfirm>
</template>
plain
//删除数据且清理
const handleDelete = (id) => {
 http.delete("/fileUpload/singleDeleteFile/"+id).then(response => {
 if(response.code === 100200){//成功
 ElMessage({
 message: response.msg,
 type: 'success',
 })
 getFileUploadList();
 }else {
 ElMessage({
 message: response.msg,
 type: 'success',
 })
 } })
}
(2)编写后端接口代码以及对应的实现类
FileUploadController中
plain
`@DeleteMapping`("singleDeleteFile/{id}")//数据库删除,并且将FastDfs存储的路径一并删除
public R singleDeleteFile(`@PathVariable` Integer id){
 return R.Success("删除成功",fileUploadService.singleDeleteFile(id));
}
接口FileUploadService中的
实现类FileUploadServiceImpl中
plain
`@Override`
public R singleDeleteFile(Integer id) {
 try {
 //首先通过id进行查找查看是否有数据
 FileUpload fileUpload = fileUploadMapper.selectById(id);
 //进行删除
 fileUploadMapper.deleteById(id);
 //删除FastDfs中的url路径
 fastFileStorageClient.deleteFile(fileUpload.getFile());
 return R.Success("删除成功");
 }catch ( Exception e){
 e.printStackTrace();
 return R.Success("删除失败");
 }
}
上传多个文件
(1)创建一个名为MultipleFile.vue的页面
plain
<script setup>
import {reactive} from "vue";
import {ElMessage} from "element-plus";
import http from "@/utils/http";

const data = reactive({
 fileList:[],
})

//限制图片格式
const beforeUpload= (rawFile) => {
 if(rawFile.type !== "application/pdf"){//设定上传什么类型的文件
 ElMessage({
 message: '只允许上传pdf类型的文件',
 })
 return false;
 }
 if(rawFile.size / 1024 / 1024 > 600){
 ElMessage({
 message: '文件超出600MB',
 })
 return false;
 }
 return true;
}

//当文件大小
const handleExceed = (files, uploadFiles) => {
 ElMessage.warning(
 `The limit is 3, you selected ${files.length} files this time, add up to ${
 files.length + uploadFiles.length
 } totally`
 )
}

//上传成功
//成功上传文件到FastDfs并且返回路径之后执行的方法
const n = (response, uploadFile, uploadFiles) => {
 if(response.code === 100200){//成功
 console.log(response)
 ElMessage({
 message: response.msg,
 type: 'success',
 })
 }else {
 ElMessage({
 message: response.msg,
 type: 'success',
 })
 }
}

</script>

<template>
 <div style="color: red">注!!!!上传多个文件时可以选择多个文件,但是vue策略还是单个上传策略</div>
 <el-upload
 v-model:file-list="data.fileList"
 class="upload-demo"
 :action="http.defaults.baseURL+'fileUpload/singleFile'"
 multiple
 :on-preview="handlePreview"
 :on-remove="handleRemove"
 :before-remove="beforeRemove"
 :limit="3"
 :on-exceed="handleExceed"
 :on-success="success"
 :before-upload="beforeUpload"
 >
 <el-button type="primary">点击上传多个文件</el-button>
 <template #tip>
 <div class="el-upload__tip">
 jpg/png files with a size less than 500KB.
 </div>
 </template>
 </el-upload>
</template>

<style scoped>

</style>
(2)注!!!!上传多个文件时可以选择多个文件,但是vue策略还是单个上传策略、所以后端接口还使用单个上传的接口
上传单个图片
(1)创建一个名为SingleImage.vue的页面
plain
<script setup>
import {reactive} from "vue";
import {ElMessage} from "element-plus";
import http from "@/utils/http";
const data = reactive({
imageUrl:''
})
//上传成功
const handleAvatarSuccess = (response, uploadFile) => {
data.imageUrl = URL.createObjectURL(uploadFile.raw)
}
//判断图片类型
const beforeAvatarUpload = (rawFile) => {
if (rawFile.type !== 'image/jpeg' && rawFile.type !== 'image/jpg') {
ElMessage.error('Avatar picture must be JPG 或者 jpg format!')
return false
} else if (rawFile.size / 1024 / 1024 > 2) {
ElMessage.error('Avatar picture size can not exceed 2MB!')
return false
}
return true
}
</script>
<template>
<el-upload
class="avatar-uploader"
:action="http.defaults.baseURL+'fileUpload/SingleImage'"
:show-file-list="false"
:on-success="handleAvatarSuccess"
:before-upload="beforeAvatarUpload"
>
<img v-if="data.imageUrl" :src="data.imageUrl" class="avatar" />
<el-icon v-else class="avatar-uploader-icon"><Plus /></el-icon>
</el-upload>
</template>
<style scoped>
.avatar-uploader .avatar {
width: 178px;
height: 178px;
display: block;
}
</style>
<style>
.avatar-uploader .el-upload {
border: 1px dashed var(--el-border-color);
border-radius: 6px;
cursor: pointer;
position: relative;
overflow: hidden;
transition: var(--el-transition-duration-fast);
}
.avatar-uploader .el-upload:hover {
border-color: var(--el-color-primary);
}
.el-icon.avatar-uploader-icon {
font-size: 28px;
color: #8c939d;
width: 178px;
height: 178px;
text-align: center;
}
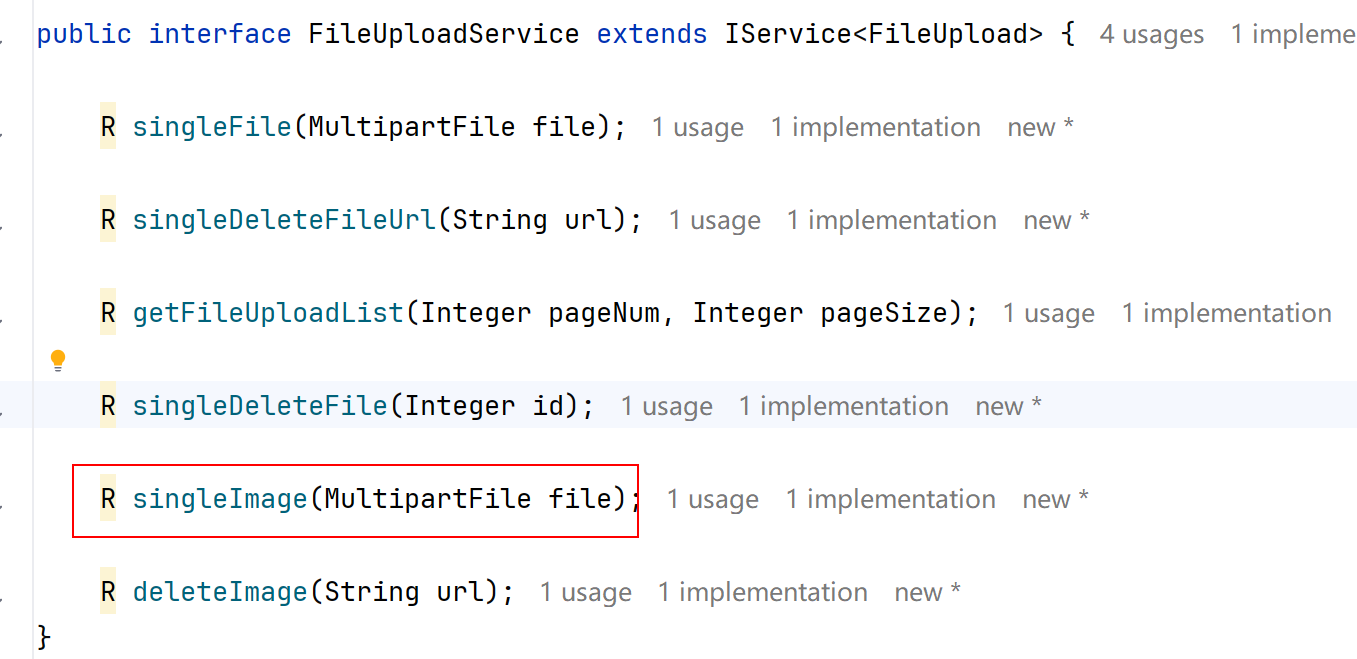
</style>(2)编写后端FileUploadController接口以及对应的实现类
plain
//单个图片上传
`@PostMapping`("SingleImage")
public R singleImage(`@RequestBody` MultipartFile file) {
 return R.Success("图片上传成功",fileUploadService.singleImage(file));
}
plain
`@Override`
public R singleImage(MultipartFile file) {
 //先上传,然后将路径返回给前端
 try {
 //读取文件大小
 long size = file.getSize();
 //后缀
 String originalFilename = file.getOriginalFilename();
 int lastIndex = originalFilename.lastIndexOf(".");
 String extName = originalFilename.substring(lastIndex + 1);
 //输入流
 InputStream inputStream = file.getInputStream();
 StorePath storePath = fastFileStorageClient.uploadImageAndCrtThumbImage(inputStream, size, extName, null);
 //返回已经上传到FastDfs上的路径
 System.out.println("上传完整路径" + storePath.getFullPath());
 System.out.println("上传路径缩列图" + thumbImageConfig.getThumbImagePath(storePath.getFullPath()));
 return R.Success("图片上传成功",basePath + storePath.getFullPath());
 } catch (IOException e) {
 e.printStackTrace();
 return R.Success("图片上传失败");
 }
}
上传多个图片墙
(1)创建一个名为MultipleImage.vue的实现类
plain
<script setup>
import {reactive} from "vue";
import http from "@/utils/http";
import {ElMessage} from "element-plus";
const data = reactive({
fileList:[],
dialogImageUrl:'',
dialogVisible:false
})
//判断图片类型
const beforeAvatarUpload = (rawFile) => {
if (rawFile.type !== 'image/jpeg' && rawFile.type !== 'image/jpg') {
ElMessage.error('Avatar picture must be JPG 或者 jpg format!')
return false
} else if (rawFile.size / 1024 / 1024 > 2) {
ElMessage.error('Avatar picture size can not exceed 2MB!')
return false
}
return true
}
//上传个数
const handleExceed = (files, uploadFiles) => {
ElMessage.warning(
`The limit is 3, you selected ${files.length} files this time, add up to ${
files.length + uploadFiles.length
} totally`
)
}
//上传成功
const handleAvatarSuccess = (response, uploadFile) => {
data.dialogImageUrl = response.data.data
}
const handleRemove = (uploadFile, uploadFiles) => {
http.delete("/fileUpload/deleteImage",{
params:{
url: uploadFile.response.data.data
}
}).then(response => {
if(response.code === 100200){//成功
ElMessage({
message: response.msg,
type: 'success',
})
}else {
ElMessage({
message: response.msg,
type: 'success',
})
}
})
}
const handlePictureCardPreview = (uploadFile) => {
data.dialogImageUrl = uploadFile.response.data.data;
data.dialogVisible = true
}
</script>
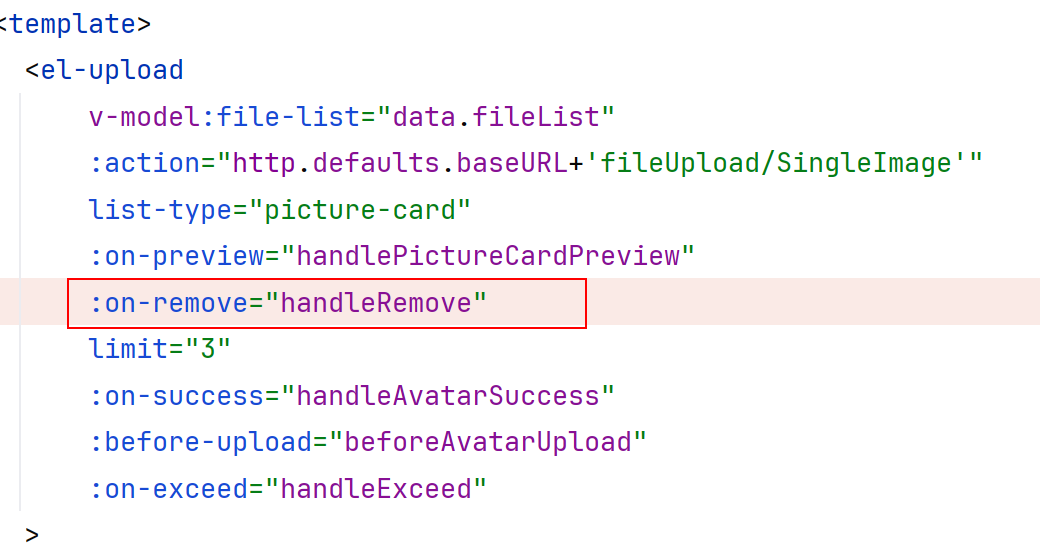
<template>
<el-upload
v-model:file-list="data.fileList"
:action="http.defaults.baseURL+'fileUpload/SingleImage'"
list-type="picture-card"
:on-preview="handlePictureCardPreview"
:on-remove="handleRemove"
limit="3"
:on-success="handleAvatarSuccess"
:before-upload="beforeAvatarUpload"
:on-exceed="handleExceed"
>
<el-icon><Plus /></el-icon>
</el-upload>
<el-dialog v-model="data.dialogVisible">
<img w-full :src="data.dialogImageUrl" width="100%" alt="Preview Image" />
</el-dialog>
</template>
<style scoped>
</style>(2)注!!!!上传多个图片时可以选择多个文件,但是vue策略还是单个上传策略、所以后端接口还使用单个上传的接口
删除图片墙中的单个(上述代码中已经编写好,此处之列举那些地方是删除的代码)
(1)前端页面中的代码
对应的方法
plain
const handleRemove = (uploadFile, uploadFiles) => {
 http.delete("/fileUpload/deleteImage",{
 params:{
 url: uploadFile.response.data.data
 }
 }).then(response => {
 if(response.code === 100200){//成功
 ElMessage({
 message: response.msg,
 type: 'success',
 })
 }else {
 ElMessage({
 message: response.msg,
 type: 'success',
 })
 }
 })
}
(2)后端接口
FileUploadController控制层代码
plain
`@DeleteMapping`("deleteImage")//清理图片
public R deleteImage(String url) {
 return R.Success("删除成功",fileUploadService.deleteImage(url));
}
FileUploadService接口
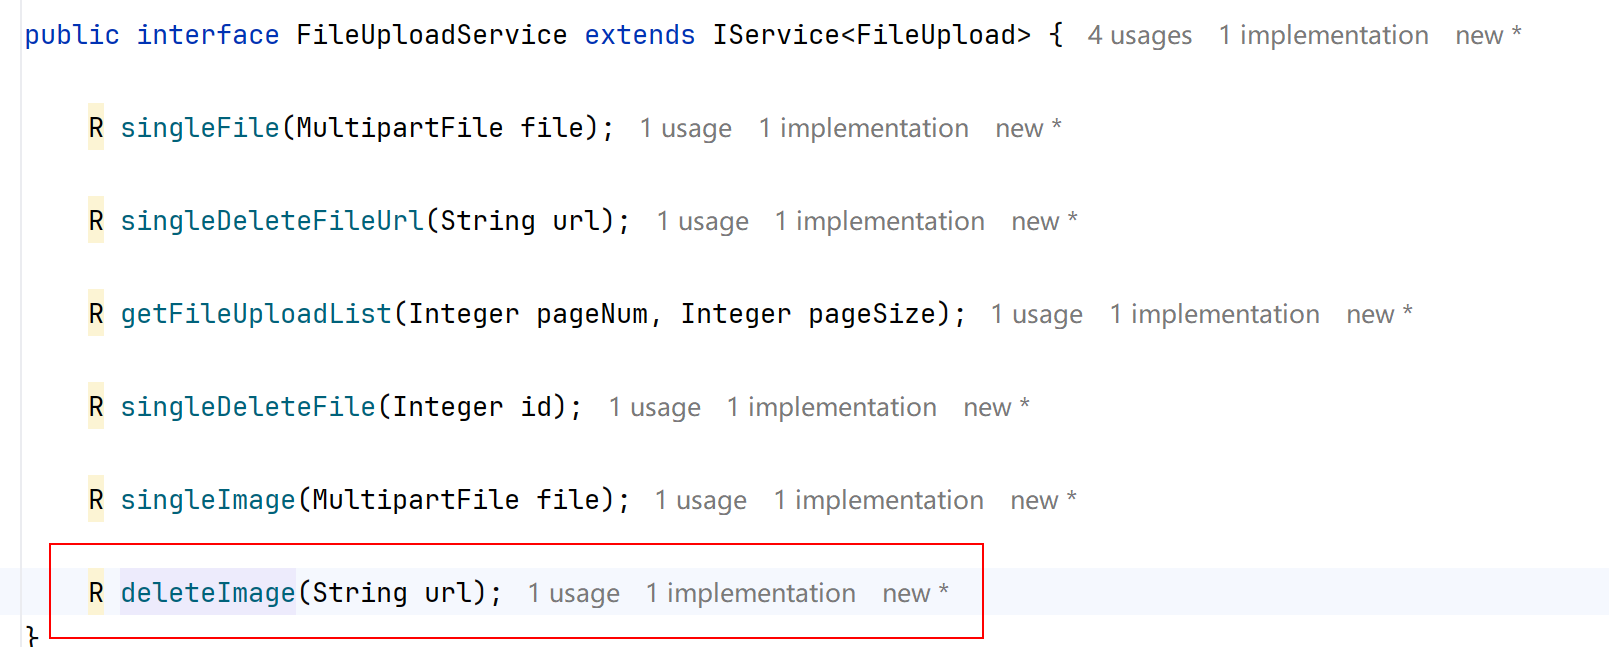
FileUploadService接口实现类FileUploadServiceImpl中
plain
`@Override`
public R deleteImage(String url) {
 // 1. 校验原始路径不为空
 if (url == null || url.isEmpty()) {
 throw new RuntimeException("原始图片路径不能为空!");
 }
 // 2. 找到最后一个"."的位置(定位.jpg的分隔点)
 int lastDotIndex = url.lastIndexOf(".");
 // 3. 拼接:文件名部分 + _100x100 + .jpg
 String fileNamePart = url.substring(0, lastDotIndex); // 文件名(不含扩展名)
 String extension = url.substring(lastDotIndex); // .jpg(含分隔点)
 String fullPath = fileNamePart + "_100x100" + extension;
 try {
 //删除上传完整路径
 fastFileStorageClient.deleteFile(fullPath);
 //删除上传路径缩列图
 fastFileStorageClient.deleteFile(url);
 return R.Success("图片清理成功",null);
 }catch (Exception e){
 e.printStackTrace();
 return R.Success("图片清理失败");
 }
}
plain
`@Override`
public R deleteImage(String url) {
// 1. 校验原始路径不为空
if (url == null || url.isEmpty()) {
throw new RuntimeException("原始图片路径不能为空!");
}
// 2. 找到最后一个"."的位置(定位.jpg的分隔点)
int lastDotIndex = url.lastIndexOf(".");
// 3. 拼接:文件名部分 + _100x100 + .jpg
String fileNamePart = url.substring(0, lastDotIndex); // 文件名(不含扩展名)
String extension = url.substring(lastDotIndex); // .jpg(含分隔点)
String fullPath = fileNamePart + "_100x100" + extension;
try {
//删除上传完整路径
fastFileStorageClient.deleteFile(fullPath);
//删除上传路径缩列图
fastFileStorageClient.deleteFile(url);
return R.Success("图片清理成功",null);
}catch (Exception e){
e.printStackTrace();
return R.Success("图片清理失败");
}
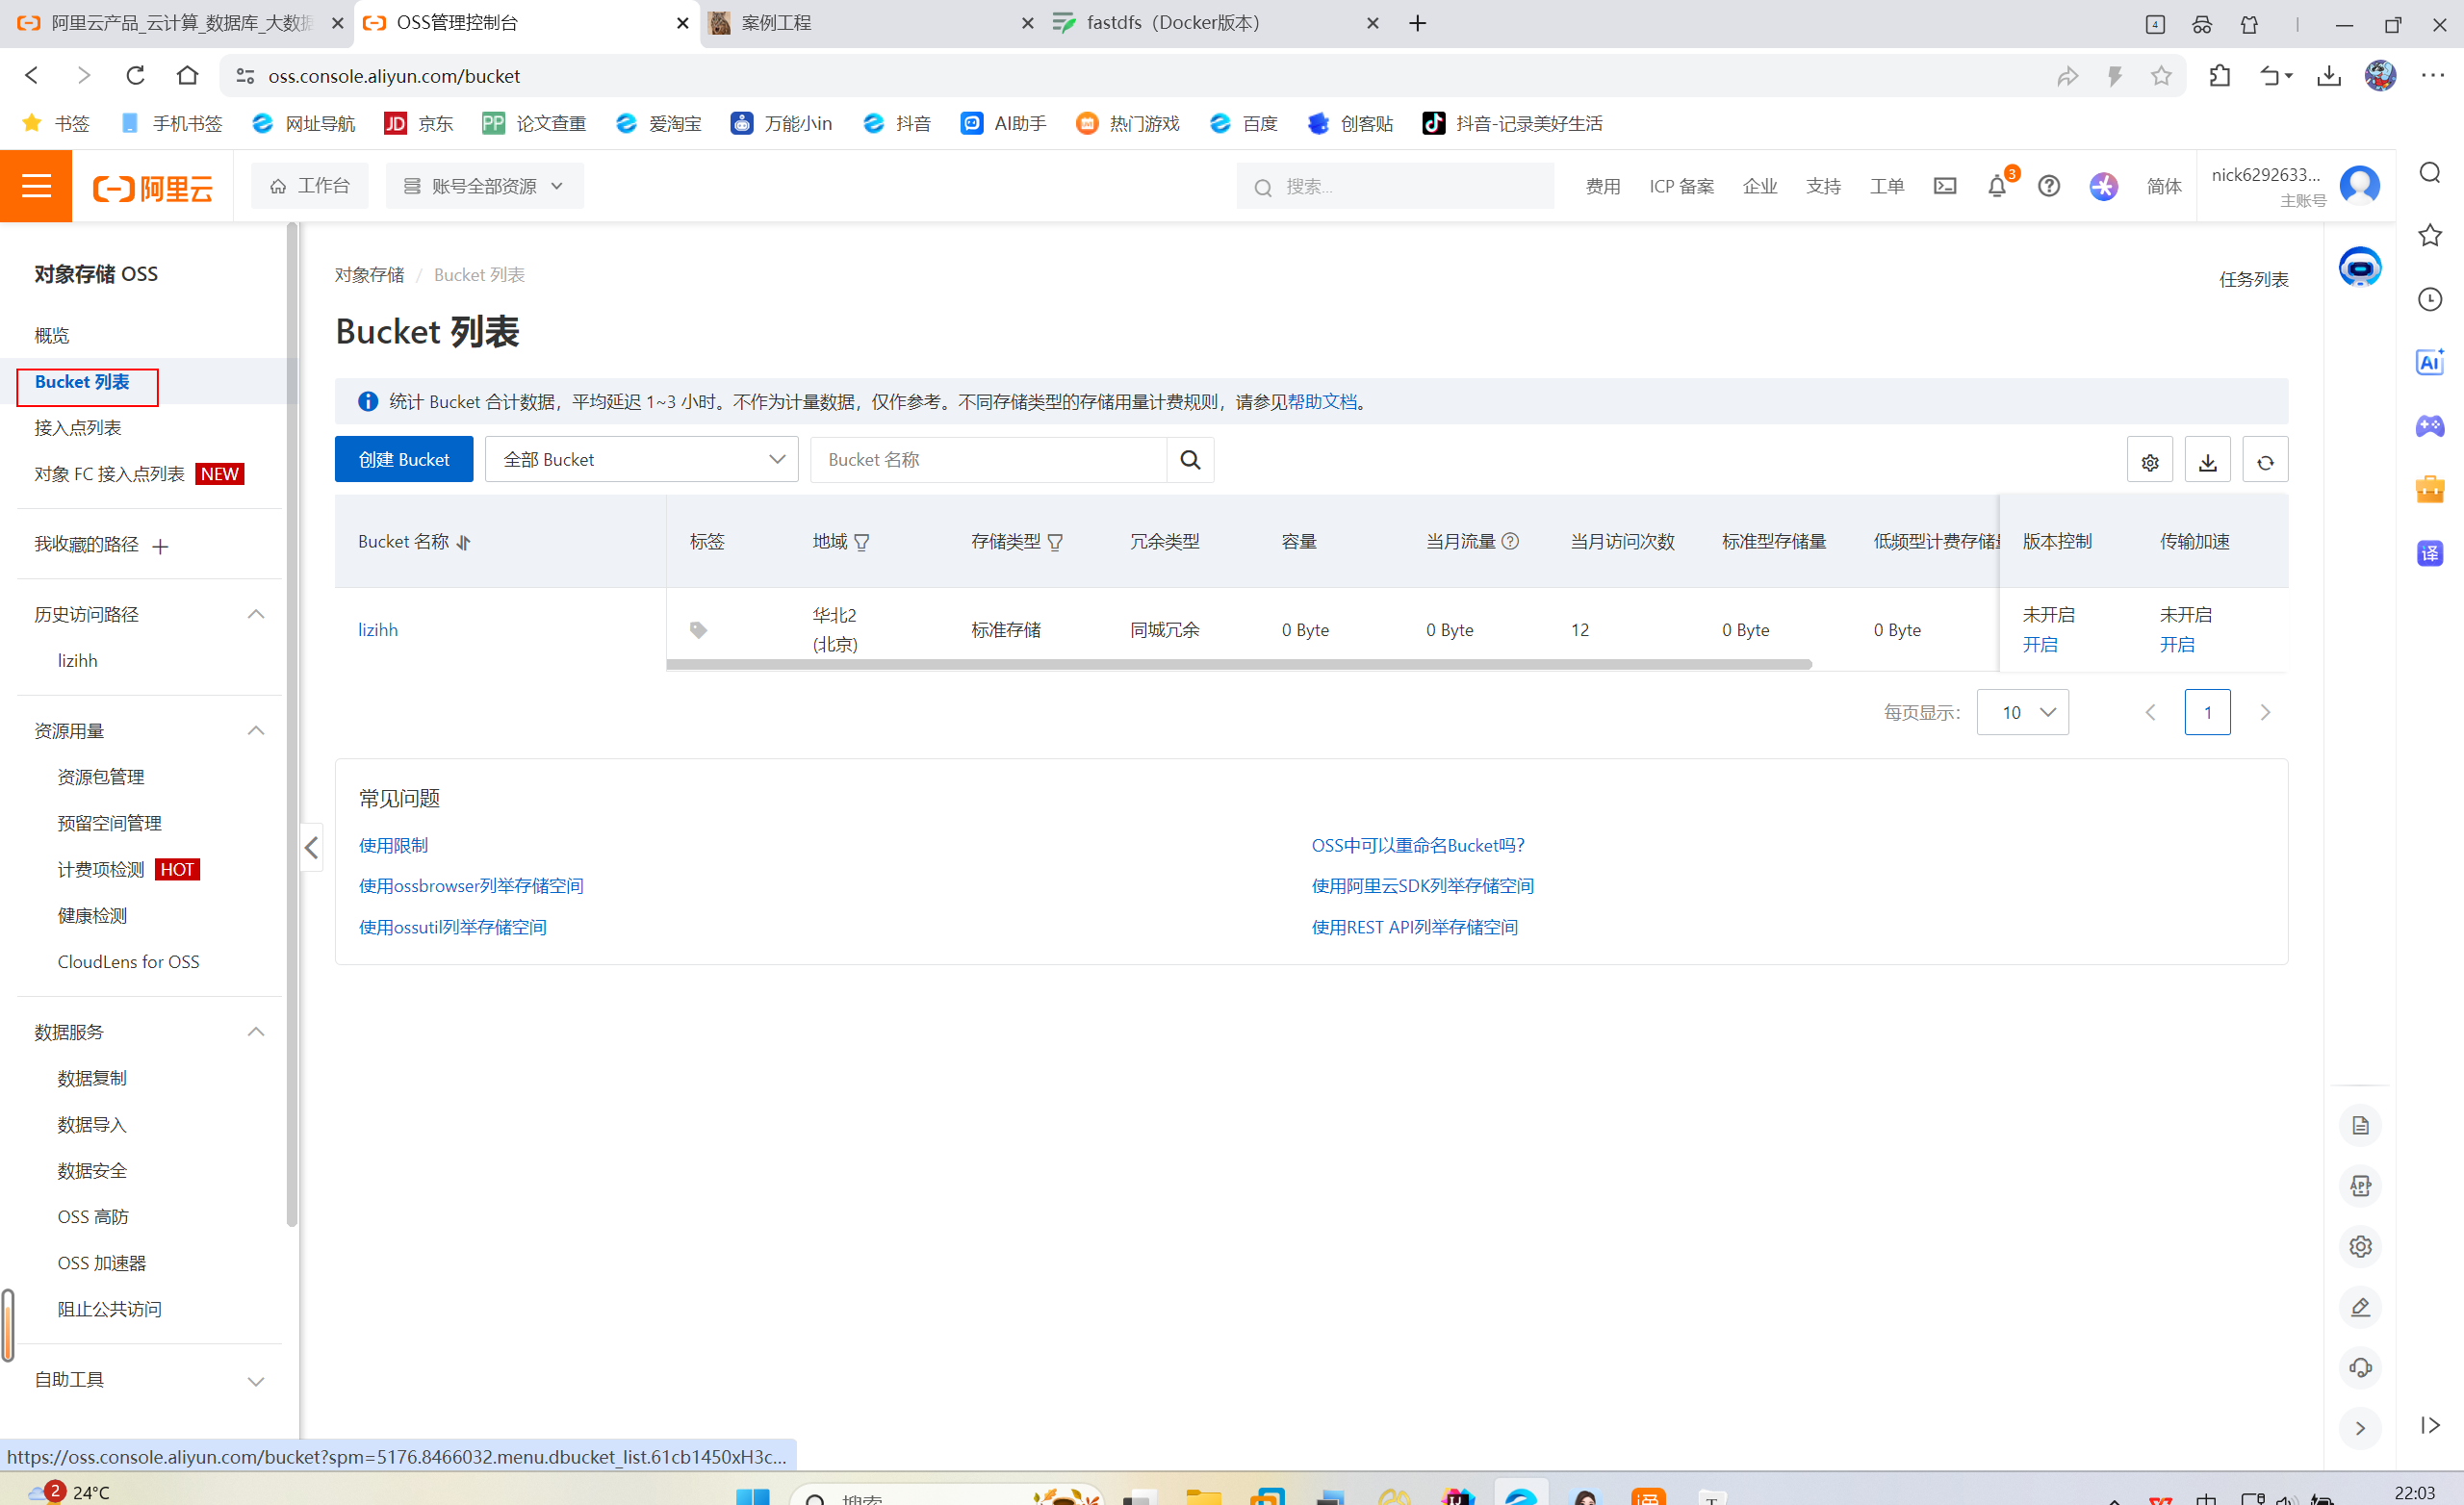
}使用阿里云对象储存OSS
(1)登录阿里云领取阿里云的对象储存OSS免费使用权
(2)注册bucket列表
(3)创建一个名为AliYunOSSFile.vue的前端页面
plain
<script setup>
import {reactive} from "vue";
import {ElMessage} from "element-plus";
import http from "@/utils/http";

const data = reactive({
 imageUrl:''
})

//上传成功
const handleAvatarSuccess = (response, uploadFile) => {
 data.imageUrl = URL.createObjectURL(uploadFile.raw)
}

//判断图片类型
const beforeAvatarUpload = (rawFile) => {
 if (rawFile.type !== 'image/jpeg' && rawFile.type !== 'image/jpg') {
 ElMessage.error('Avatar picture must be JPG 或者 jpg format!')
 return false
 } else if (rawFile.size / 1024 / 1024 > 2) {
 ElMessage.error('Avatar picture size can not exceed 2MB!')
 return false
 }
 return true
}

</script>

<template>
 <h2>AliYun</h2>
 <el-upload
 class="avatar-uploader"
 :action="http.defaults.baseURL+'oss/uploadAliYunOSS'"
 :show-file-list="false"
 :on-success="handleAvatarSuccess"
 :before-upload="beforeAvatarUpload"
 >
 <img v-if="data.imageUrl" :src="data.imageUrl" class="avatar" />
 <el-icon v-else class="avatar-uploader-icon"><Plus /></el-icon>
 </el-upload>
</template>

<style scoped>
.avatar-uploader .avatar {
 width: 178px;
 height: 178px;
 display: block;
}
</style>

<style>
.avatar-uploader .el-upload {
 border: 1px dashed var(--el-border-color);
 border-radius: 6px;
 cursor: pointer;
 position: relative;
 overflow: hidden;
 transition: var(--el-transition-duration-fast);
}

.avatar-uploader .el-upload:hover {
 border-color: var(--el-color-primary);
}

.el-icon.avatar-uploader-icon {
 font-size: 28px;
 color: #8c939d;
 width: 178px;
 height: 178px;
 text-align: center;
}
</style>
(4)创建一个名为AliYunOSSController的控制层
plain
package com.xja.application.web;

import com.xja.application.service.AliYunOSSService;
import com.xja.application.utils.R;
import org.springframework.beans.factory.annotation.Autowired;
import org.springframework.web.bind.annotation.PostMapping;
import org.springframework.web.bind.annotation.RequestMapping;
import org.springframework.web.bind.annotation.RestController;
import org.springframework.web.multipart.MultipartFile;

`@RestController`
`@RequestMapping`("oss")
public class AliYunOSSController {
 `@Autowired`
 private AliYunOSSService aliYunOSSService;

 `@PostMapping`("uploadAliYunOSS")
 public R uploadAliYunOSS(MultipartFile file) {
 return R.Success("uploadAliYunOSS",aliYunOSSService.uploadAliYunOSS(file));
 }
}
(5)对应的接口AliYunOSSService
plain
package com.xja.application.service;

import com.xja.application.utils.R;
import org.springframework.web.multipart.MultipartFile;

public interface AliYunOSSService {
 R uploadAliYunOSS(MultipartFile file);
}
(6)接口对应的实现类AliYunOSSServiceImpl
plain
package com.xja.application.service.impl;

import com.aliyun.oss.OSS;
import com.aliyun.oss.OSSClientBuilder;
import com.aliyun.oss.model.PutObjectRequest;
import com.xja.application.service.AliYunOSSService;
import com.xja.application.utils.R;
import org.springframework.stereotype.Service;
import org.springframework.web.multipart.MultipartFile;

import java.io.InputStream;

`@Service`
public class AliYunOSSServiceImpl implements AliYunOSSService {
 // 阿里云OSS配置信息
 private static final String ENDPOINT = "oss-cn-beijing.aliyuncs.com"; // 地域Endpoint
 private static final String ACCESS_KEY_ID = "LTAI5tJp8aec5Ft1gDRCQNQg"; // 你的AccessKey ID
 private static final String ACCESS_KEY_SECRET = "Lee7NAS7YmkXaw0GmYuQkYiX1SOXoi"; // 你的AccessKey Secret
 private static final String BUCKET_NAME = "lizihh"; // 你的Bucket名称

 `@Override`
 public R uploadAliYunOSS(MultipartFile file) {
// 创建OSS客户端实例
 OSS ossClient = new OSSClientBuilder().build(ENDPOINT, ACCESS_KEY_ID, ACCESS_KEY_SECRET);
 //获取文件名字
 String filename = file.getOriginalFilename();
 try {
 InputStream is = file.getInputStream();
 // 上传文件
 PutObjectRequest putObjectRequest = new PutObjectRequest(BUCKET_NAME, filename, is);
 ossClient.putObject(putObjectRequest);
 //动态生成公网访问地址
 String fullPath = String.format("https://%s.%s/%s", BUCKET_NAME, ENDPOINT, filename);
 return R.Success("文件上传成功",fullPath);
 } catch (Exception e) {
 e.printStackTrace();
 return R.Failed("文件上传失败");
 }
 }
}